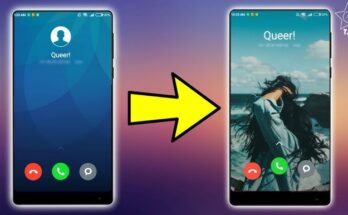
In recent years, artificial intelligence (AI) has dramatically reshaped the way we create and interact with media. One fascinating innovation is the ability to animate still photos, breathing life into static images by transforming them into dynamic videos. With the right AI tools, anyone can convert photos into animated videos with ease, whether for personal, creative, or marketing purposes. Here’s a step-by-step guide on how you can make photo-animated videos using AI tools.
What Are AI Photo Animation Tools?
AI photo animation tools use machine learning algorithms to analyze still images and animate them. These tools can detect key facial features, gestures, or even background elements, and simulate motion by interpolating frames or applying predefined animations. The result is a fluid, lifelike video where the subjects in photos seem to move, blink, smile, or even talk.
Why Use AI for Photo Animation?
- Ease of Use: Traditional animation requires considerable skill and time. AI-powered tools automate the complex process, allowing anyone to create professional-quality animations with little effort.
- Time-Efficient: Animating photos manually can take hours or days. AI tools often complete the task in minutes, making them ideal for those on tight schedules.
- Cost-Effective: Hiring an animator can be expensive, but AI photo animation tools are typically much more affordable or even free, especially for basic features.
Steps to Make Photo-Animated Videos Using AI Tools
Let’s break down the process of turning a static photo into an animated video using AI tools:
1. Choose an AI Tool
Several AI tools are available that allow you to animate photos. Some of the most popular include:
- Deep Nostalgia by MyHeritage: Specializes in animating old photographs, particularly faces.
- Luminar AI: Known for editing photos, but also offers photo animation features.
- Pixaloop (by Enlight): Allows users to animate specific elements of a photo like clouds or water.
- D-ID: A deep-learning-based tool that can animate faces and even generate talking videos.
Each of these tools comes with its unique features, and you can pick the one that best suits your needs.
2. Upload Your Photo
Once you’ve chosen an AI tool, the next step is to upload the photo you want to animate. Most AI animation tools allow you to simply drag and drop your image onto their platform, or you can select the image from your device.
Here are a few tips for choosing the right photo:
- High Quality: Use a clear, high-resolution image for the best animation results.
- Good Lighting: A well-lit photo will make the animated results more lifelike.
- Facial Features: If you’re animating a portrait, make sure the face is clearly visible.
3. Select Animation Features
Once the photo is uploaded, you’ll usually have options for different types of animations:
- Facial Movements: Some AI tools allow you to animate facial expressions, such as blinking, smiling, or moving the eyes.
- Full-Body Animations: For full-body photos, tools can animate gestures or body movement, depending on their complexity.
- Talking Animations: More advanced tools, such as D-ID, can sync mouth movements with audio, allowing you to create talking animations of your photos.
Simply choose the type of animation you want to apply, and the tool will automatically begin processing.
4. Customize the Animation
Many AI tools allow for some customization of the animation. For example, you can adjust:
- Animation Speed: Decide how fast or slow the movement should be.
- Direction of Movement: Choose the direction in which different elements move, such as the clouds in the sky or the subject’s eyes.
- Expression Intensity: Some tools let you choose how dramatic the facial expressions should be.
Customizing these elements allows you to create a more personalized video that suits your vision.
5. Add Audio or Music (Optional)
If you want to take your animation a step further, you can add audio or background music. Some AI tools offer in-app music libraries, or you can upload your own sound files.
- Narration: Add a voice-over or sync the animated lips with pre-recorded speech.
- Music: Choose background music to set the mood of your animated video.
Audio adds another layer of engagement and can help to tell a more compelling story through your animated photo.
6. Export and Share Your Video
After creating your animation, most tools will allow you to export the video in various formats like MP4, GIF, or MOV. You can choose the resolution based on where you plan to share the video — higher resolutions are better for platforms like YouTube, while smaller resolutions are ideal for quick sharing on social media.
Once exported, you can easily upload and share your animated video on platforms like Instagram, TikTok, Facebook, or even embed it in websites or presentations.
Best Practices for AI Photo Animation
- Use High-Resolution Photos: The better the quality of your input photo, the more lifelike the animation will be.
- Avoid Over-Editing: Simplicity can be effective. Sometimes, subtle movements like a smile or blink can make a bigger impact than complex animations.
- Experiment with Tools: Different tools have different strengths. Try experimenting with a few to see which one gives the most natural-looking results for your photos.
Conclusion
AI-powered tools are revolutionizing how we interact with still images, offering a new dimension of creativity. Whether for personal nostalgia, creative projects, or marketing purposes, these tools make it easier than ever to animate photos and create engaging videos. By following these steps, you can turn your still images into dynamic, animated videos in no time. Get started today and bring your photos to life!


